Showing posts with label tutorials. Show all posts

Friday, November 17, 2017

Tutorial: Handmade Pillows Using a Flour Sack Towel


About a week ago, I shared over on Instagram a pillow I made using a cute Christmas Flour Sack towel I found at Walmart. Yes. Walmart. The response was way more than I ever expected. I honestly think that we collectively as Instagram quilters have caused a run on these towels at Walmart.


In my store they were located in the seasonal houseware section near the new Pioneer Woman Christmas collection. I didn't find them with the main section of dish towels. You can only buy them in store, but you can view them online and check your local inventory.

Here are links to the two deigns I used so you can check inventory near you. There are other designs, but I didn't link them all here. You can find them by searching Walmart.com for 'holiday flour sack towel'.

Have Yourself a Merry Little Christmas
Meet Me Under the Mistletoe 


I really think they turned out super cute and I hope you enjoy making one, or several this Christmas season!


  To make one 18" pillow you will need:


1 flour sack towel *
3/4 yd of fabric for borders and backing*
* There is enough toweling to use for the envelope back, but you will need two towels. If you do this you will only need 1/4 yd fabric for the borders. If you use the toweling for the envelope back, you can use the existing hem from the towel. Cut two pieces 18" x 13.5". The toweling is thin, so I did reinforce the pieces with Pellon SF101.
14" square of fusible interfacing, I love to use Pellon SF101
2 1/4 yds pom pom trim - I purchased mine from Creative Trims on Etsy, this type specifically

Seam allowances are 1/4" unless otherwise stated. 

1. Unfold the towel and unpick the bottom hem.  Yes, I know I hate using my seam ripper too. However, you need the extra material to square up the design and center everything nicely. It takes about 2 minutes and it's worth it. Iron towel to remove wrinkles and creases. 


2. Measure the design from top to bottom to determine the size of the center.  You want some white space around the design, so don't measure too close.  For the towels I used, I decided on 13.5" FINISHED /14" UNFINISHED. You will cut the towel design to 14" square.


 3. To make this a little easier and to accurately center the design, cut a piece of fusible interfacing 14" square or the same size as the UNFINISHED center. Fold this into quarters, and finger press to crease.

4. Take the towel and fold in half as shown below. You are lining up the top and bottom of the design. When I folded it, I lined up the holly leaves from the top and bottom. The towel is thin enough that you can see through or you can hold it up to a sunny window if needed.  Finger press or press using an iron to create a crease.


5. Repeat in the other direction, this time lining up the sides of the design.  Press to crease.


6. Unfold the towel and interfacing. You will have creases on the towel and interfacing. Place towel right side down and place the interfacing on the back of the towel, adhesive side down.  Line up the creases to center the design. (This was hard to photograph because it also shows all the other creases, but it was easy enough to line up.) Adhere the interfacing following the manufacturer's directions.  After adhering, trim leaving about 1/4" on each side.


7. Do a final trim to square up the center to 14" square. Your design is now perfectly centered! Press well.


8.  Next cut your borders.  I wanted my pillow to finish at 18".

Here's the math incase you want to make a different size
18" (finished pillow)  - 13.5" (finished center) = 4.5"
4.5" / 2 (for two borders) = 2.25" (finished borders)  + .5" (seam allowance) = 2.75" unfinished borders/what you will cut your borders

Cut two 2.75" x WOF strips for your borders. Attach borders as you would for a quilt. Press borders away from the center.

9. I have a serger and at this point, I serge all my raw edges. Totally optional.


You now have a completed pillow top! Yay!

For finishing you have quite a few options. If you choose to add pom pom trim, follow the steps below.  For the other steps in completing a pillow, refer to my post Tips for Perfect Pillows and refer to the appropriate sections.

To learn how to prepare your envelope backing pieces scroll down to section 3.
For an 18" pillow you will cut {2} envelope backing pieces 13"x 18".

To learn how to attach the envelope backing pieces scroll down to section 4.
If you add pom pom trim, follow the steps for an UNBOUND pillow.

To learn how to bind a pillow scroll down to section 5.
First, attach the backing pieces as outlined in section 4 for a BOUND pillow.

Attaching Pom Pom Trim

I love attaching pom pom trim to pillows! It totally gives a fun and unique look and I think it's a little quicker than binding a pillow.

1. First, you want a mark around the perimeter of the pillow to line up your trim. Since I serge around all my pillows, I use one of the stitching lines from my serger as my mark. If you don't serge your pillow top, and most probably won't, I recommend sewing a basting stitch around the perimeter of your pillow about an 1/8" away from the edge. (Do this in a contrasting color so you can see the line.) I do this so the edging from the pom pom trim isn't lost in the seam allowance. You could also mark with a pencil or other marking tool. Do whatever is easiest and makes sense to you!


2. Starting from the bottom center, line up your pom pom trim with your mark and with the pom poms towards the center of your pillow.  Leave a nice tail of pom pom trim free so you can overlap the ends when you finish.  Sew the pom pom trim using a narrow and short zig zag stitch. If you use a wide zig zag, you will pull the edge of the fabric in and you will loose the fabric edge. It's SO much easier to sew it down with a zig zag stitch rather than a straight stitch. Trust me. Use a matching thread color so it blends in nicely if you sew beyond the future seam allowance.  Make sure to sew on the actual trim and not go off onto the fabric too much.


3. When you get to a corner, stop about 1/2" from the edge and remove the pillow top from your machine. Work the trim to follow the corner (it does this very easily) and start sewing from the adjacent side. Continue all the way around the pillow.


4. As you approach the beginning, you may need to clip off a few of the pom poms so you can overlap the ends. Overlap the ends and point the ends away from the pillow top as shown below.


5. Continue sewing over the overlapped trim, maintaining the seam allowance. Backstitch to secure. I prefer to leave the tails long, just in case, so I don't trim.


6. You've attached your trim! Yay! To finish your pillow, refer to my post Tips for Perfect Pillows and scroll down to section 4 and follow the steps for an UNBOUND pillow. When I sew on my envelope backing pieces I use a 3/8" seam allowance. Also make sure all your cute pom poms stay turned towards to the center of your pillow.

Happy Sewing!

Monday, April 11, 2016

Simple Patchwork Pillows - FREE Pattern

One thing I love making right now are pillows. When I made my first quilted pillow, I had no idea how much I'd enjoy making them and how dare I say...addicting...they'd turn out to be.

Over Christmas, I made this super simple and oh so cute Christmas pillow from a collection of my vintage/vintage inspired Christmas fabrics I love to hoard keep on hand for Christmas projects.  I made three of them as gifts.


Christmas. I love it.

Then I made the same pillow using one of my beloved Happy Go Lucky charm packs (I just cut it into 2.5" squares) to make for my friend Christine.


Then I made all of these.


See addicting.

So today I'm sharing the pattern for these pillows because they really are super simple and super addicting. (It's so simple, but the pattern includes full directions on finishing the pillow.) So dig out that random mini-charm pack and make something fun and quick for yourself. Or cut that prized what-in-the-world-can-I-make-with-only-one-charm-pack into 2.5" squares and have enough fabric for four pillows. You know one for you the rest for friends...or for your couch. Because a couch full of pretty pillow like these....is quite a fun sight.


That is until, your kids or husband, throw them on the ground one minute after you arrange them just so. Oh well, even if that happens, take a picture to document it and frame it where you can see if often. Then you can sigh at pillow perfection whenever you feel the need. 

Happy Sewing!

Pattern: Simple Patchwork Pillows by Everyday Celebrations


Friday, March 21, 2014

Tutorial: April Showers Baby Quilt

Happy March! So I hate to say it but it has been AWHILE since I last posted. I am still here, but I've had other responsibilities as of late, none sewing related in the slightest. However, I am very happy to be sharing some of my latest sewing today on the blog. 

If you click through, you'll notice I've been doing some cleaning and sprucing up on the blog. On the right sidebar are links to my tutorials, Pinterest, and Instagram.  I also added a link to all the quilts I've made to date. (Or at least the ones I've photographed.) I receive many emails, mainly from Pinterest pins, asking me about patterns, fabrics, etc for my quilts. So I hope this will help answer those questions!

Today I am here to share with you a tutorial I whipped up for the Moda Bake Shop. (I LOVE doing projects for them.) I made two little baby quilts using the wonderful new line April Showers by Bonnie and Camille.  The Baby Showers quilts are the same design, but each use a different placement of the blocks. To make each quilt all you need are 10 fat quarters, background yardage, backing, and binding.  They really are easy and quite a fun project! I hope you enjoy.


Happy Friday! 

LeAnne

Friday, September 13, 2013

Tutorial: Fairground Quilt {banner quilt}

I love banners. Love. I have one for about every holiday that I love to hang up on my mantel. (I'll have to get some pictures!)

At the beginning of the year, I sketched up this quilt and waited for the perfect fabric line. I originally wanted to make it out of Happy-Go-Lucky, but it was no longer available when I submitted this to Moda. So, I waited some more. Then I saw Scrumptious and I knew it was 'the one'. (Click here for the full tutorial over at Moda Bake Shop.)


I have to say this was a FUN quilt to make. I am finding I love to design quilts that have a variance from block to block. Maybe so I don't get bored making the same block 40 times. :) This quilt features four different blocks and I love how it turned out. The hardest part of this quilt was deciding on a border fabric. First I wasn't going to do a border, but then I thought it needed it, but I didn't want it to over power the blocks. So I went with a very small-scale print and hoped for the best.


 Hope you enjoy this tutorial as much as I enjoyed making the quilt. You can find the full tutorial over at Moda Bake Shop. You also can see all my other free tutorials from the Bake Shop here.


Thanks for reading!

LeAnne :)

Wednesday, July 24, 2013

Tutorial: Charming Christmas Ornaments

It's beginning to look a lot like....Christmas?! Yep. Or at least in my living room it is. :)


I've had a great time cooking up some fun Christmas Ornaments for Moda Bake Shop as part of their Christmas in July series. Although it is July, get a little 'holly jolly' a little early this year and head on over to check out my tutorial.

 These are the ornaments you can find in the tutorial:


The handprint ornaments make a great keepsake....

Who doesn't love a little hexi?


The mini-hexi's are even cuter.

Simple. Classic. Perfect.
Simple and square.


So that is one of the many projects going on over here. I have lots more to come. :)

Thanks for reading,

LeAnne

Tuesday, January 15, 2013

Tutorial: Marmalade Squares Quilt

tap...tap...tap...is this thing on?!

Yep. It's been awhile. Too long. The holidays have come and gone but there is nothing like a fresh New Year. I am excited for 2013 and I hope you all are too.
 
Today I am happy to share a tutorial that I did for the Moda Bakeshop. It is a very cheery quilt, which is perfect for the long and cold month of January.

 
This quilt was made for my daughter's first birthday back in October. It was a fun quilt to make and I absolutely loved working with Marmalade. It is such a pretty line. Don't be discouraged by all those small squares. The quilt uses strip piecing so it looks a lot harder than it is. :)


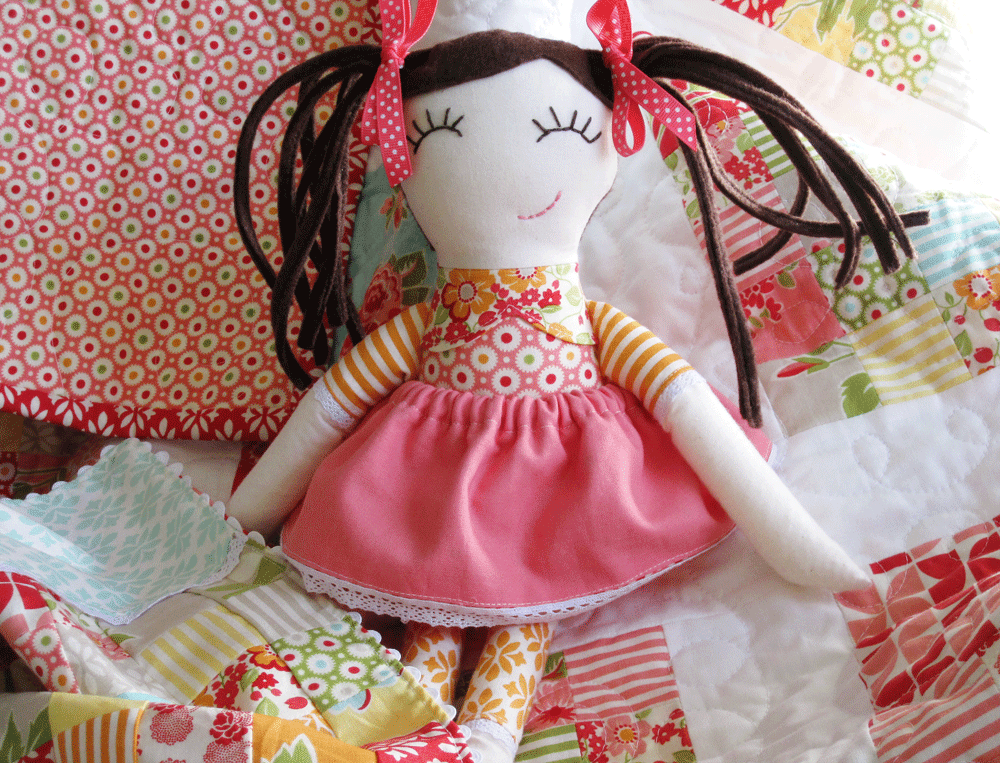
When I made my oldest daughter's 1st birthday quilt, I made a Ruby Lou doll. So naturally, I had to make a Ruby Lou for daughter #2. (Yes, she matches the quilt.) 


Ruby meets Ruby. However, we can't possibly have two dolls named Ruby. Or so says my three year old. Any ideas?

I know this is late in saying, but I hope you all had a marvelous holiday season. I am excited for 2013! Thanks for my faithful readers, drop a comment so I know who all is still out there! :)

Happy Wednesday!

Thanks for reading,

LeAnne

Tuesday, September 18, 2012

tutorial: Ruffled Half/Lap Apron

This is a tutorial I did for another blog a couple of years back. The blog is not actively posting/gone private for the time being. I've gotten quite a few emails asking for it - thanks Pinterest - so I am posting on my blog so you all can see it! Enjoy!


Ruffled Half/Lap Apron Tutorial

- 5/8 yard of cotton fabric - ties & bottom ruffle (red polka dot fabric)
- 1/4 yard each of three cotton fabrics - remaining ruffles (other three fabrics pictured)
- 10.5" x 21" piece or 1/3 yard of cotton fabric (You will not see this fabric, you sew the ruffles to this piece.)
-thread

Notes:
WOF = Width Of Fabric
RST - Right Sides Together
Prewash and dry all fabrics before beginning

1. Cut one 12" x 21" piece from the 1/3 yard of fabric.

2. Cut three 6.5" x WOF (width of fabric - approx 42") pieces from the 1/4 yard pieces. (for ruffles)

3. From the 5/8 yard of fabric cut: (pictured red polka dot fabric)
- one 6.5" x WOF  piece (for ruffle)
- one 6" x 21" piece (for top center band)
- two 6" x 36" pieces (for ties)

4. Take the 12" x 21" piece and fold it into thirds, measure up about 4", fold up to the middle, and iron to crease. Repeat with the top. These will be the marks for your ruffles.


5.  On one long edge of a ruffle piece, fold under 1/4" and press. Repeat. Sew hem in place using 1/8" seam allowance. This will be the bottom edge of the ruffle. Repeat for all the ruffle pieces.


6.  On all but the bottom ruffle piece, repeat step 5 on both short sides of ruffles.


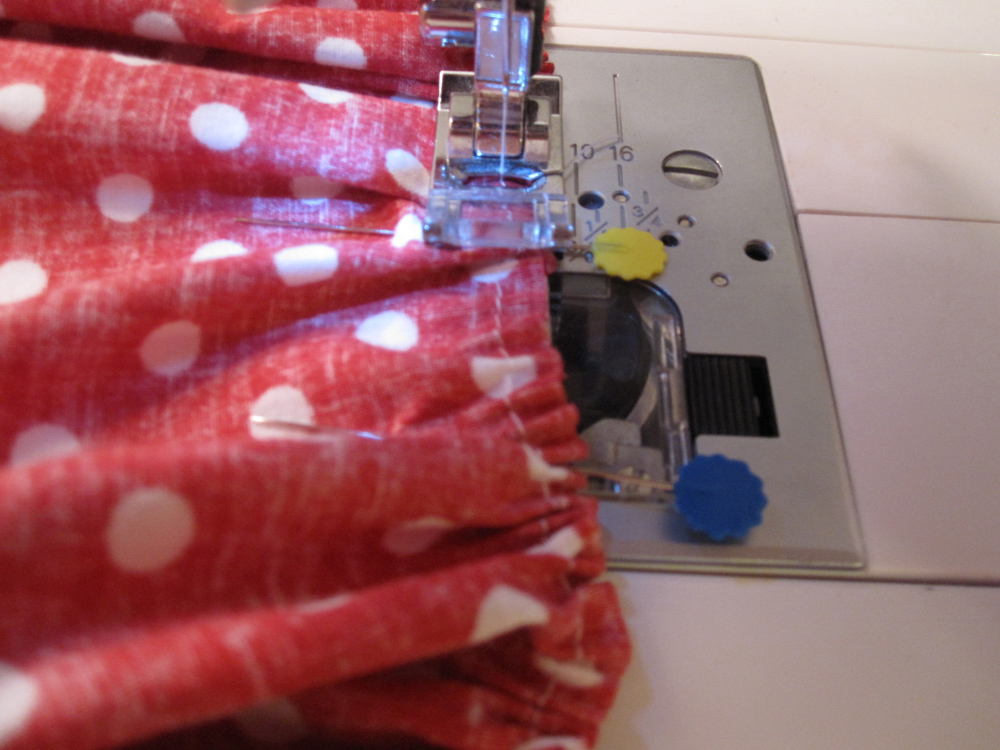
 7. Ruffle the ruffle pieces along the top raw edge. Not sure how to ruffle? Check out my tutorial here.

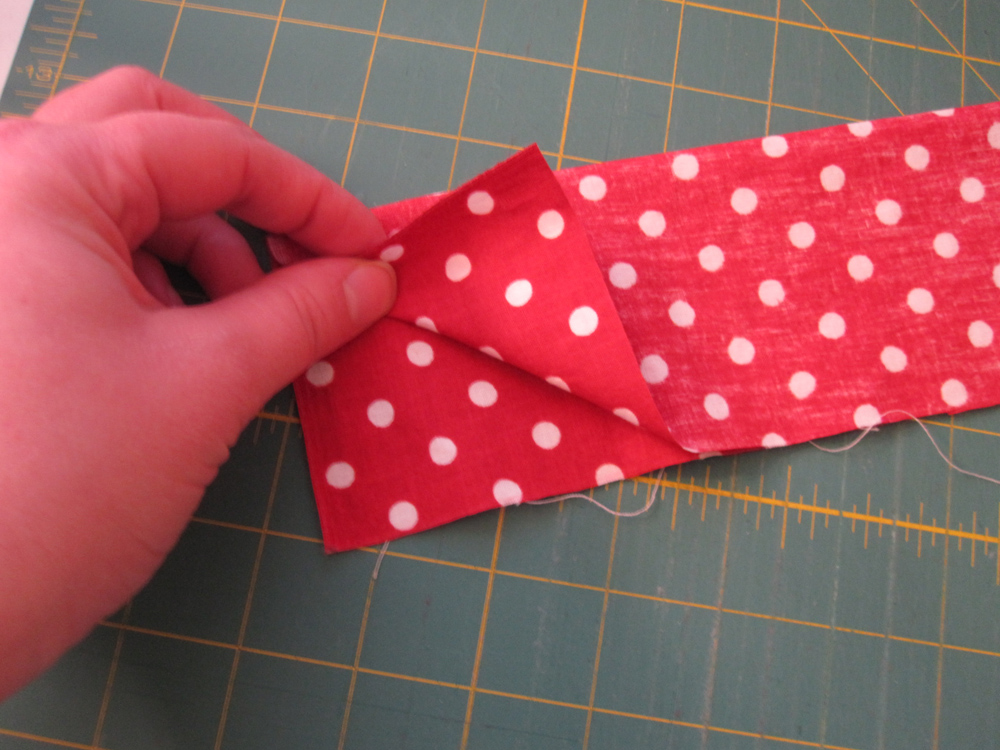
8. Along the bottom edge of the 12" x 21" piece, pin the bottom ruffle in place with RST and matching the raw edges. (The ruffle will be upside down.) This should be the ruffle with the sides NOT folded under.
Tip: I like pin the sides in place like in the second photo below to help keep the ruffle piece in place.


9. With the ruffle wrong side up, Sew the bottom ruffle in place using, 3/8" seam allowance. 


10. Flip apron to the back and press the seam up towards the top. Serge or zig-zag the raw edge.


11. Top stitch on the front side of the apron about 1/8" from where the bottom ruffle and apron panel meet.


12.  On one side of the apron, fold under 1/4" and press. (From the top of the to the bottom of the ruffle.) Fold under 1/4" and press again. Sew in place 1/8" from the edge. Repeat for the other side.


13. Working from the bottom up, place the next ruffle upside down and right side down on the apron panel. (The right side of the ruffle will be touching the apron.)  Lineup the top raw edge with the first crease from the bottom. Pin in place.

The wrong side of the second ruffle is facing up.


14.  Sewing on the wrong side of the ruffle, sew the ruffle in place. You can sew just on top of the sewing line from ruffling or just beside it, about 3/8" from the edge of the ruffle. Backstitch at beginning and end.


15.  Adjust the ruffle so it now points down to the bottom ruffle. Press. Turn the apron to the back and press with an iron to make sure the apron panel is smooth.


16. Turn the apron over to the front. Press the ruffle again if necessary. Sewing from the front, sew the ruffle in place about 1/2" from top edge of the ruffle. If you lift up the ruffle, all your raw edges should be enclosed.


17. Repeat steps 13 - 16 for the next ruffle. This time line up the ruffle with the next crease line.

18. For the top ruffle, simply line up the raw edges of the apron panel with the top edge of the ruffle. (Wrong side of the ruffle will be touching the apron panel.) Sew in place with 3/8" seam allowance.


19. Sew the ties and top band together RST. (The center band needs to be in the middle and a tie on either side.) It will be WAYYYY long. Press seams open. Fold in half the long way, wrong sides together, and press.


19. Center the WAYYY long band/ties over the apron panel RST and pin. The seams should be on either side of the apron panel. Sew only to the apron panel using 1/2" seam allowance. Do not sew onto the free hanging ties.


20. Press the seam and place the band/ties up as shown below. You should now see the right side of the band/ties. Press well.


21. Now fold the band/ties down, RST so the raw edges of the free hanging ties meet. Pin the free hanging ties every few inches.


22. Start sewing at the end of one tie and continue sewing. Stop when you get to the apron panel. Skip over the apron panel and continue sewing the other tie together. Clip corners at the ends. Press. You will have an opening over the apron panel.


23. Turn the ties right side out. Push the end back through the tie with a wooden spoon or pen.


 24. Working from the back of the apron, tuck the raw edge of the band/tie to the inside and press. Pin in place from the front, being sure to catch the back of the band with your pins. Top stitch 1/4" from the edge starting at one of the ties continuing onto the apron, closing the opening, and ending at the end of the other tie. Press well when completed.


You are done! Enjoy your fun ruffly apron or have fun making it for a friend! Either way, these fun ruffles make wearing an apron just a little more fun and sassy!


Happy Sewing!

LeAnne

LinkWithin

Related Posts with Thumbnails